By Noah Courser-Kellerman, Farmer at Alprilla Farm
Photos by Paul Cary Goldberg and Sophie Courser-Kellerman
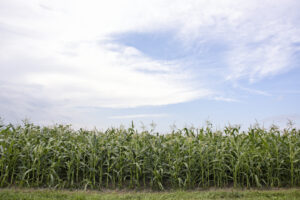
Garland Flint Corn in the field at Alprilla Farm
A perfect early fall meal from the garden: Crack open a cold cider pressed from last fall’s apples. Pull up a chair and pile your plate high. Golden tortillas from a steaming stack wrapped in cloth. Black beans rich, earthy and loaded with chiles, garlic and spices, some roasted squash, greens, sour cream, cheese. Ladle on some salsa fresca from the last of the tomatoes and peppers, bright with vinegar, garlic and cilantro. You can see the garden from where you sit on the porch. Trellises of tired tomato vines, vetch and rye poke up beneath the squash vines. Kale, cabbage, Brussels sprouts, carrots and beets are all resolutely green despite the chill in the air, ready to fill the root cellar in a couple of weeks. The corn stalks tower over everything, green leaves streaked with yellow, haggard but proud, their flinty kernels hardening by the day. At their feet, the beans sprawl, their velvety leaves loosening to show the cream colored pods drying in the early evening light. It looks good and tastes even better.
I’ve long thought about farm and garden planning as meal planning. When we decide what to grow, we should start with the question of “what would we like to eat next season”, or in the case of our farm, “what would our CSA shareholders like to eat?” From there, we decide what makes sense for us to grow, given constraints of time, climate and space. For those with very limited space, vegetables and herbs undeniably offer the greatest benefit to a family’s diet. For those with a little more space to work with, staple crops such as field corn and dry beans are a way to take family scale food production to the next level. Unlike cereal crops such as wheat, rye, oats and barley, corn and beans require little or no specialized equipment to make abundant, filling, nutrient dense food for your family.
Corn and beans are plants that are native to the Americas, where they were developed over thousands of years under the care of Indigenous farmers into a profusion of flavors, colors and adaptations to thrive from Quebec to the Amazon Basin. Five centuries of genocide and colonialism resulted in an incalculable loss both of crop varieties and the peoples who brought them into existence.
As Europeans colonized this continent, they adapted Indigenous crops and techniques to their farming systems. As a farmer of European descent who has learned to farm using mainly European systems, I can only present the techniques I have used to grow these Indigenous American crops. My lack of knowledge of Indigenous farming is something that I acknowledge and am beginning to address, and I encourage you to do the same.
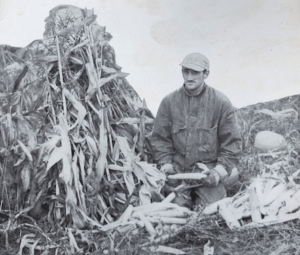
Sophie Courser-Kellerman’s grandfather, Fred, harvesting flint corn in 1939.
My wife’s family recently found a photograph of her grandfather as a young man proudly holding some ears of corn he had just picked. They are clearly an eight-row flint corn, cold hardy and adapted to central New Hampshire, likely almost unchanged from the corn the Pennacook grew on the banks of the nearby Merrimack River. As far as I know, this particular variety, like most of Northern New England’s flint corn, is gone forever—replaced by a genetic bottleneck of corporate-owned hybrids.
To grow one’s own staple crops is, I believe, a radical act. It is a rejection of standardization and commodification, the idea that something’s value is only what it can fetch on an international market. It is the best way to stop the loss of valuable, regionally-adapted varieties and flavors. It affirms both the uniqueness of each piece of land and each grower, and also connects us to the past and future through the seeds we plant and the seeds we reap. It is a way to be resilient and to eat delicious food that cannot be bought at a supermarket.
Corn, Zea mays
First, you will need to decide what kind of corn to plant. Field corn can be roughly divided into three groups: Flint, Flour and Dent.
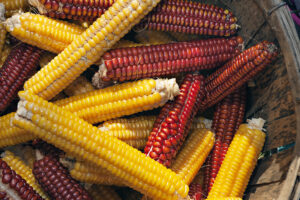
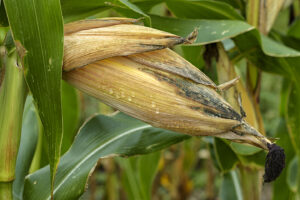
Ears of Garland Flint Corn
Flint corns, as their name suggests, have hard, glassy kernels and were developed by Indigenous peoples from the mid Atlantic to Quebec. They are well adapted to the short, wet and cool growing conditions of the Northeastern US. Perhaps the best known flint readily available in this region is Abenaki Calais Flint, AKA Roy’s Calais Flint. This short (5 or 6 feet) but low yielding corn is resilient and early. Its ears are long and have eight rows of kernels, all either a deep gold or bright red. It is delicious and forgiving to the novice corn grower. Other flint corns are garland flint, which was developed for higher yield and better standability from Abenaki Calais and other flints, and Rhode Island Whitecap Flint, famous for making Johnny Cakes.
Flour corns have a similar appearance to flint corn, but have softer, more easily ground kernels. They originate from the Southern and Western regions of North America, and supposedly are susceptible to rot in our humid climate. The only member of this group that I have grown is Painted Mountain, which is a modern open pollinated variety from the upper mid west, very early, adaptable and delicious. Its multi colored ears grind up to make a pink (dare I say spam-like?) polenta. It grew well for me. I also know someone who grows Hopi Blue successfully in Rhode Island.

Wapsie Valley Dent Corn
Dent corns share characteristics of both flint and flour corns, and are defined by triangular kernels that have hard, flint-like starch with a core of softer, flour like starch on its top. The soft starch shrinks as it dries, leaving a slight indentation at the top of each kernel. Modern industrial hybrid corn is dent corn, but there are many open pollinated varieties that are both delicious and higher yielding than flint and flour corns. My favorite of these is Wapsie Valley. It stands well in the field, up to 8 feet tall, yields well, and makes big, fat ears ranging from light yellow to deep red. It makes a delicious cornbread and tasty tortillas. Like many old dent corn, however, it requires a longer growing season than Abenaki Calais Flint or Painted Mountain, so if you live in a cold place or can’t plant on time it may not be the variety for you. I encourage you to try varieties until you find ones that you really like—don’t be afraid to try something that isn’t adapted to your region, just hedge your bets by planting a local standby too.
Wapsie Valley Dent corn in the field at Alprilla Farm, fall 2020.
Yield will vary considerably between varieties, growing practices and the weather. A 20 by 40 foot garden plot should yield at least a bushel of dry grain (60 pounds). A variety like Abenaki Calais Flint may yield less. Wapsie Valley Dent may yield significantly more.
Growing field corn differs from sweet corn primarily in that it is left in the field until it is completely mature. It is a heavy feeder, and will appreciate abundant nitrogen and phosphorus. A good feeding of compost or chicken manure will help it get off to a good start, as would a plowed (or tarped) down leguminous cover crop like vetch, Austrian winter peas or clover.
Corn thrives in warm weather. Wait to plant until the soil is at least 55 or 60 degrees Fahrenheit. It is tempting to plant too soon, on the first hot days in May. Remember, it takes longer for the soil to warm than the air. We also always, it seems, have some beautiful warm days followed by miserable cold wet weather—a recipe for rotten corn seed. Resist the temptation. The third week of May seems about right. Old lore has it that one should plant corn when oak leaves are the size of a squirrel’s ear. I’ve found this to be too early, but it may be spot on in more inland areas that warm up faster.
Plant 6 or 8 inches apart in rows three feet apart, about an inch and a half deep. Plant by hand into a furrow if you till, or chop in seeds with a trowel if you don’t. Whatever amount of corn you plant, make sure that you plant at least four or five rows for good pollination.
Watch out for cutworms, especially if you are planting after a lush cover crop or are planting no-till. Groundhogs and crows are your next challenge. I recommend eating the groundhogs, but not the crows. Better yet, covering your corn with old row cover will protect it from both groundhogs and crows, and give it a jump on the season by providing a little bit of extra warmth. Stay on top of weeds. It’s a lot easier to hoe when weeds are small.
Happy corn grows fast. “Knee high by the fourth of July” is a useful benchmark. Many old open pollinated varieties grow tall and gangly and fall over easily. If you are growing on bare ground, use hoeing as an opportunity to prop your plants up. Hill around the base of the stalk as you would potatoes. Adventitious “buttress” roots will emerge and stabilize the plant.
Before the corn forms a full canopy between the rows, consider spreading seeds of a cover crop like yellow sweet clover or medium red clover before your last hoeing, ideally before a good rain. Alternately, you can mulch between rows, which will also help with water retention.
First, tassels will emerge, then silks as the ear begins to form. Water is important as the ears fill. The country song has it right: Rain makes corn. If, on a hot afternoon, you notice leaves curling up, you know your corn is thirsty. Try to water it if you can. If you peel back the husks, you will soon see what looks like sweet corn: kernels are filled with starchy, watery liquid. This is called the “milk” stage. As the corn continues to ripen, the kernels will begin to harden from the outside down to where they connect to the cob. Eventually, the entire kernel will be hard to the touch, but still slightly tacky, and the plants will begin to die back and dry. Check on your corn regularly: wildlife will be watching, too. At a certain point, when you pull kernels off of the cob, you will see a little brown plate where the kernel connects to the ear. This means that the kernel has fully matured, and built a barrier between itself and the cob. Your corn is physiologically mature. Traditionally, corn was left to dry in the field. I recommend harvesting as soon as “black layer” is reached, because losses from mold and wildlife will only increase as the weather deteriorates into the fall.
Black Layer stage
Now is the time to select seed for next year, assuming that you are a good distance from other corn, especially if it is genetically modified. Take your time—stand in your corn patch and look for plants that haven’t fallen over, have matured on time and resisted insect and disease. By growing a variety of corn year after year, you can help it adapt to your particular land and become stronger than it was before. Even though you may not need much seed for your garden, choose at least a dozen ears for seed to prevent inbreeding. You can eat the seed that you don’t intend to plant or give away.
Pick the rest of your corn and husk it. The grain is still much too wet to store at this point, and will need to dry further. Find a rodent proof, dry place with good air flow: You could put them in an onion sack and hang from a rafter in the garage or attic from a wire, or build a “crib” from rat wire by making a column from a 2 or 3’ diameter tube of wire and filling it with ears. If you have more corn, consider making a rectangular crib—try to avoid making a pile of wet ears of corn thicker than 3’ or so. A box fan will speed drying. It takes longer to dry corn than you would imagine. I have found that corn dried at ambient outdoor temperatures may not be dry enough until February to store in a sealed container. If you can bring your corn indoors into a heated space, it will dry much more quickly.
When your corn is dry, pop the kernels off of the ear with your hands, or use a metal hand sheller (see the resource section at the end of this article for links). This is a fun job for kids. If you start growing corn at a bigger scale, keep an eye out for a hand cranked corn sheller at antique stores and barn sales.
As you shell your corn, be careful to avoid any damaged or moldy kernels. This can be a problem in areas with high populations of corn earworm. Use a hatchet (carefully!) to chop off the damaged ends of the ears before you shell them.
Now you are ready to make your corn into food! The simplest way to eat your corn is to make cornmeal. Freshly ground corn has a beautiful aroma, similar to sweet corn and grass, and makes polenta, cornbread and pancakes that are really, really tasty. There are several hand cranked and electric mills on the market, ranging from forty to several hundred dollars. I recommend the unfortunately named “Corona” mill: it is cheap, made of durable cast iron, makes fine-enough cornmeal, and can also be used for making masa for tortillas or tamales.
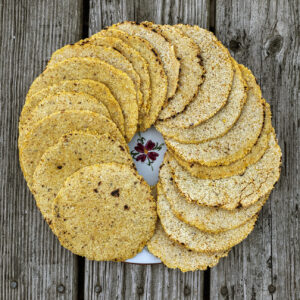
Handmade corn tortillas
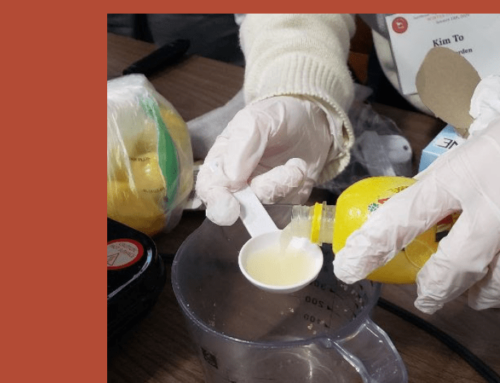
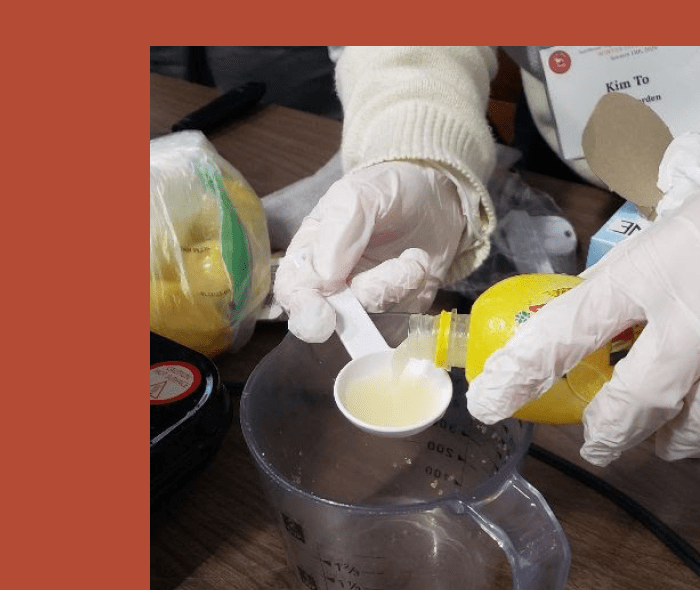
To make tortillas, tamales and hominy, you will need to process your corn using an ancient American technique called nixtamalization. Dry kernels of corn are cooked in an alkaline solution of water and wood ashes or calcium hydroxide (sold as pickling lime) then left to soak overnight or longer. The kernels swell, turn bright yellow, and their skins become gelatinous and are scrubbed off under cold running water. The whole, nixtamalized kernels are hominy—put them in soups and stews. If you eat meat, make pozole. To make masa, the dough used for tortillas and tamales, grind the hominy in the corona mill or food processor, and add just enough water to make a pliable dough. Roll small balls of masa flat between two sheets of plastic or waxed paper, and carefully peel off onto a hot, ungreased skillet. I am a very novice tortilla maker, and tend to make ugly tortillas. They are still delicious, and totally worth the work. If you decide to nixtamalize your corn, I recommend reading this much more detailed and informative article [https://roundthebendfarm.org/2018/11/06/corn-nixtamalization-recipes-and-recommendations-for-efficiency/ ] on the subject by Laura Killingbeck, written for Round the Bend Farm’s blog.
Beans Phaseolus vulgaris
Beans, with nixtamalized corn and their sister squash, have nourished people across the Americas for millennia. There is no easier, better, or tastier way for people in our region to provide abundant, economical protein for their families. Beans come in a staggering variety of shapes, sizes, colors, and names. Unlike corn, they do not readily cross-pollinate, so you can grow several varieties in your garden and still save your own seed. Beans are wonderfully forgiving and resilient. My first bean crop grew from some Goya black beans that I planted in an extra row in my garden when I was in high school. Black beans are still my favorite to grow. They are high yielding, reliable germinating, tasty and easy to process. Heirloom beans like Jacobs Cattle, like heirloom tomatoes, are wonderful but pickier and lower yielding than their modern counterparts. Bush type beans grow knee or thigh high, and don’t need trellising. Pole beans are ideal for very small spaces, as they grow larger and yield more, but are more work to harvest. Consider a dual purpose pole bean like Kentucky Wonder or Rattlesnake, which you can use for snap beans for a while, then let mature for dry beans. A garden plot 30 by 40 feet will yield around a bushel of dry beans (60 pounds). A modern variety of black bean or kidney may yield more, and an heirloom like Jacobs Cattle or Sulfur will likely yield less.
Dry beans are the same species as snap beans, and are grown the same way. Beans, like corn, need warm soil to thrive. If you plant too soon, germination will be spotty and weeds will grow faster than the beans. Beans can be planted later than corn because most varieties mature more quickly. A good planting date for dry beans is the first week of June. As members of the legume family, they are able to work with symbiotic bacteria to pull nitrogen from the air and use it to grow. This does not mean that beans will thrive on infertile soil. Inoculate your beans, and make sure your soil has plenty of phosphorus and potassium. A judicious amount of compost is well worth it for beans, but avoid high nitrogen amendments like chicken or raw cattle manure or you will get lots of bean leaves but few pods. Beans can work well in a no-till system. My only caveat is to try to pull mulch away from germinating beans so that slugs and cutworms have less cover. You can pull mulch back around the plants once they have a few true leaves.
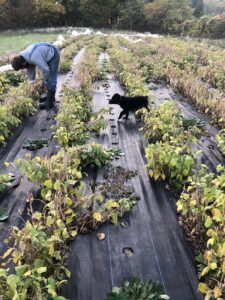
Clipping black bean plants
Plant beans 2 to 4 inches apart in rows 2.5 to 3 feet apart, an inch or so deep. In 5 days or so, depending on temperature, you should see little seedlings emerging. Like corn, beans are a favorite of groundhogs and other critters. Row cover can be a useful tool to get them past their most vulnerable stage. Control weeds similarly to corn. A cover crop can be overseeded in the same way, too. As your beans flower and set pods, keep them well weeded and watered. This is the period that really sets your yield. As the pods fill with seeds and begin to dry down, the leaves will yellow and begin to fall off. When most pods seem dead and the beans contained in them are fully colored, you are ready to harvest. Some folks pull the whole plants. I find that this gets too much soil mixed into the beans, so I prefer to use pruning clippers and cut the plants just above the soil line. Dry the plants on a sheet or tarp in an attic, dry garage or shed, or if you have room and patient cohabitants, inside. For smaller amounts, tie them in bundles with twine and hang them upside down. Don’t pile them more than two or three plants deep, and turn them for the first few days so any leaves dry without trapping moisture. If you grow pole beans, you will need to pick the individual pods by hand.
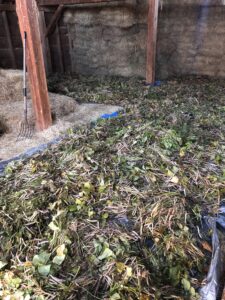
Black bean plants drying
Sometime in the early winter, when you can no longer dent the beans with a thumbnail, it will be time to thresh your beans. Be creative: the idea is to whack the plants so that the pods split and the beans fall out. You can rattle plants around in a metal garbage can. You can spread a clean tarp on the driveway, place beans on it, and drive donuts with your lawn mower. You can hit them with sticks, or better yet put some music on, find some family and friends (social distancing allowing) and dance out your beans.
In any case, you will be left with a messy pile of powdery, dusty leaves, stems and beans all mixed together. Use a pitchfork to sift out the plants, then scoop up the rest and sift it through a piece of half inch hardware cloth on top of a box or bucket to get out more pods and stems. Winnow by pouring the mixture back and forth between two boxes or buckets in front of a box fan or on a windy day. The air will carry away most of the remaining leaf matter, leaving mostly clean beans. Do a final hand sorting of the beans on a winter’s eve in front of the fire to remove any remaining stems, pods, rotten beans or stones.
When I started growing dry corn and beans in my garden when I was in high school, I was drawn to them in a way that I still can’t entirely explain. “Why bother?” the ‘real’ farmers would ask, pointing out that commodity corn was going for a pittance per bushel and beans were the cheapest thing in the supermarket. I kept growing them anyway, studied farming in college and found justifications like food sovereignty, sustainability and the culinary superiority of heirloom, open pollinated varieties. All of those reasons are good, but that’s not really why, years later as a professional farmer, I keep growing them.
Something about these plants spoke to me then and still does today. A handful of flint corn kernels, glowing gold and copper seemingly from within, is movingly beautiful in a way that lifeless gems are not. That handful of corn has the power to nourish us today, or, more importantly, to re-create itself infinitely into the future. They are beautiful and precious because of their fecundity and utility, not in spite of it. That beans and corn are familiar and inexpensive only increases my awe for them. I believe that there is a place in more of our gardens for these powerful and generous plants. If we nurture and steward them, they will feed us well.
Resources
Seeds:
Fedco Seeds/Organic Grower’s Supply
Books:
Small Scale Grain Raising, by Gene Logsdon (Chelsea Green Publishing)
The Organic Grain Grower, by Jack Lazor (Chelsea Green Publishing)
In this book, my late mentor writes about his experiences growing corn in Northern Vermont, and of his participation in the creation and maintenance of Early Riser, a new, open pollinated composite variety of corn. A good read for anyone interested in on farm breeding and seed saving.
Resources on Indigenous food sovereignty and agriculture:
Sierra Seeds https://sierraseeds.org/, is an organization run by Rowen White, Indigenous food activist, seed saver, farmer, educator (and keynoter at the 2018 NOFA Summer Conference)
Native American Food Sovereignty Alliance https://nativefoodalliance.org/

